
Getting started
Set up your workspace
The first time you open BlackAha, a short Guided Setup helps you do three things: make sure your plan is active, tell BlackAha which online store is yours, and add one product to watch. It takes about five minutes.
Before you start
- A BlackAha account. No account yet? Create one here.
- The web address of your online store, for example yourshop.com.
- One product you sell, plus the link to its page on one or two competitor stores.
How Guided Setup works
Guided Setup opens by itself after you log in, until all three steps are done. It only shows the steps you have not finished yet.
- Not ready for a step? Press Skip this step. Nothing is lost, and you can come back later.
- Your progress also appears on the dashboard in the Finish setting up card. Select any unfinished line there to open that step again.
Step 1: Check your plan
BlackAha needs an active plan before it can start checking prices. New accounts usually start on the free trial.
Look at the message
If the step says your plan is active, you are ready. Move on to the next step.
Start the free trial, if asked
If no plan is active yet, press Start free trial. You do not need to enter payment details.
Tip Already used your free trial? The step offers Open billing in a new tab. Choose a plan in the new tab, then come back. You can compare plans on the pricing page.
Step 2: Add your store’s web address
BlackAha calls this your business domain. It is simply the address of your own online store. Prices found on your store become the reference, and every competitor price is compared with them.
Type the address
In Business domain, type only the address, without https:// in front. For example: yourshop.com.
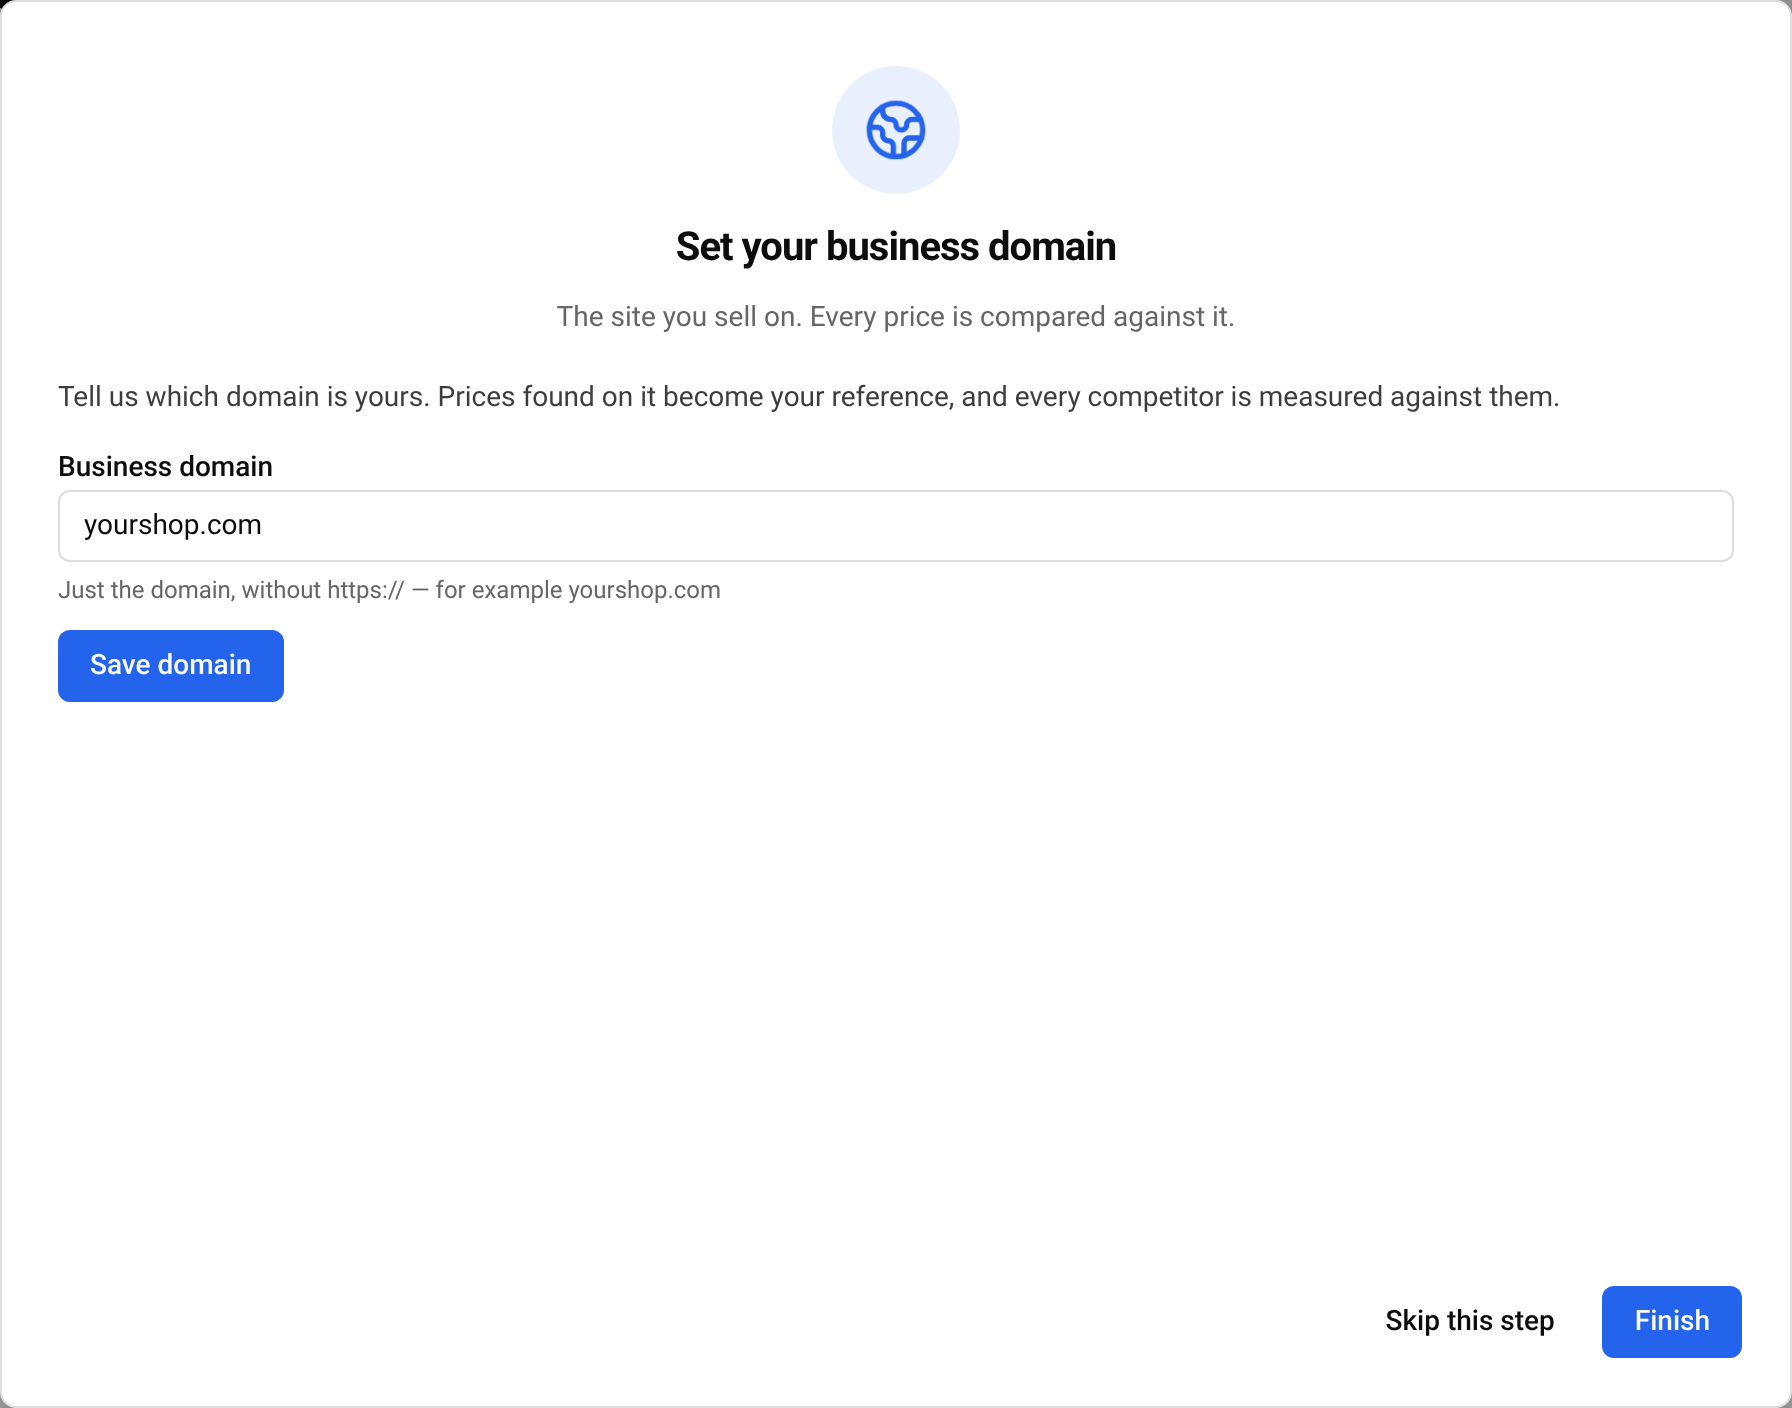
Save it
Press Save domain. A message confirms the address you saved.
Important Only the owner or an admin of the workspace can set this address. You can change it later in SettingsSet business domain, but the number of changes is limited. That screen shows how many changes you have left.
Step 3: Track your first product
Here you add one product and the pages where it is sold. Each page link is one price that BlackAha checks for you, automatically.
Describe the product
Fill in Product name and Product code. These two are required. The code can be anything short, as long as no other product uses it. Category, Brand and GTIN / barcode are optional, but category and brand help you read your reports later.
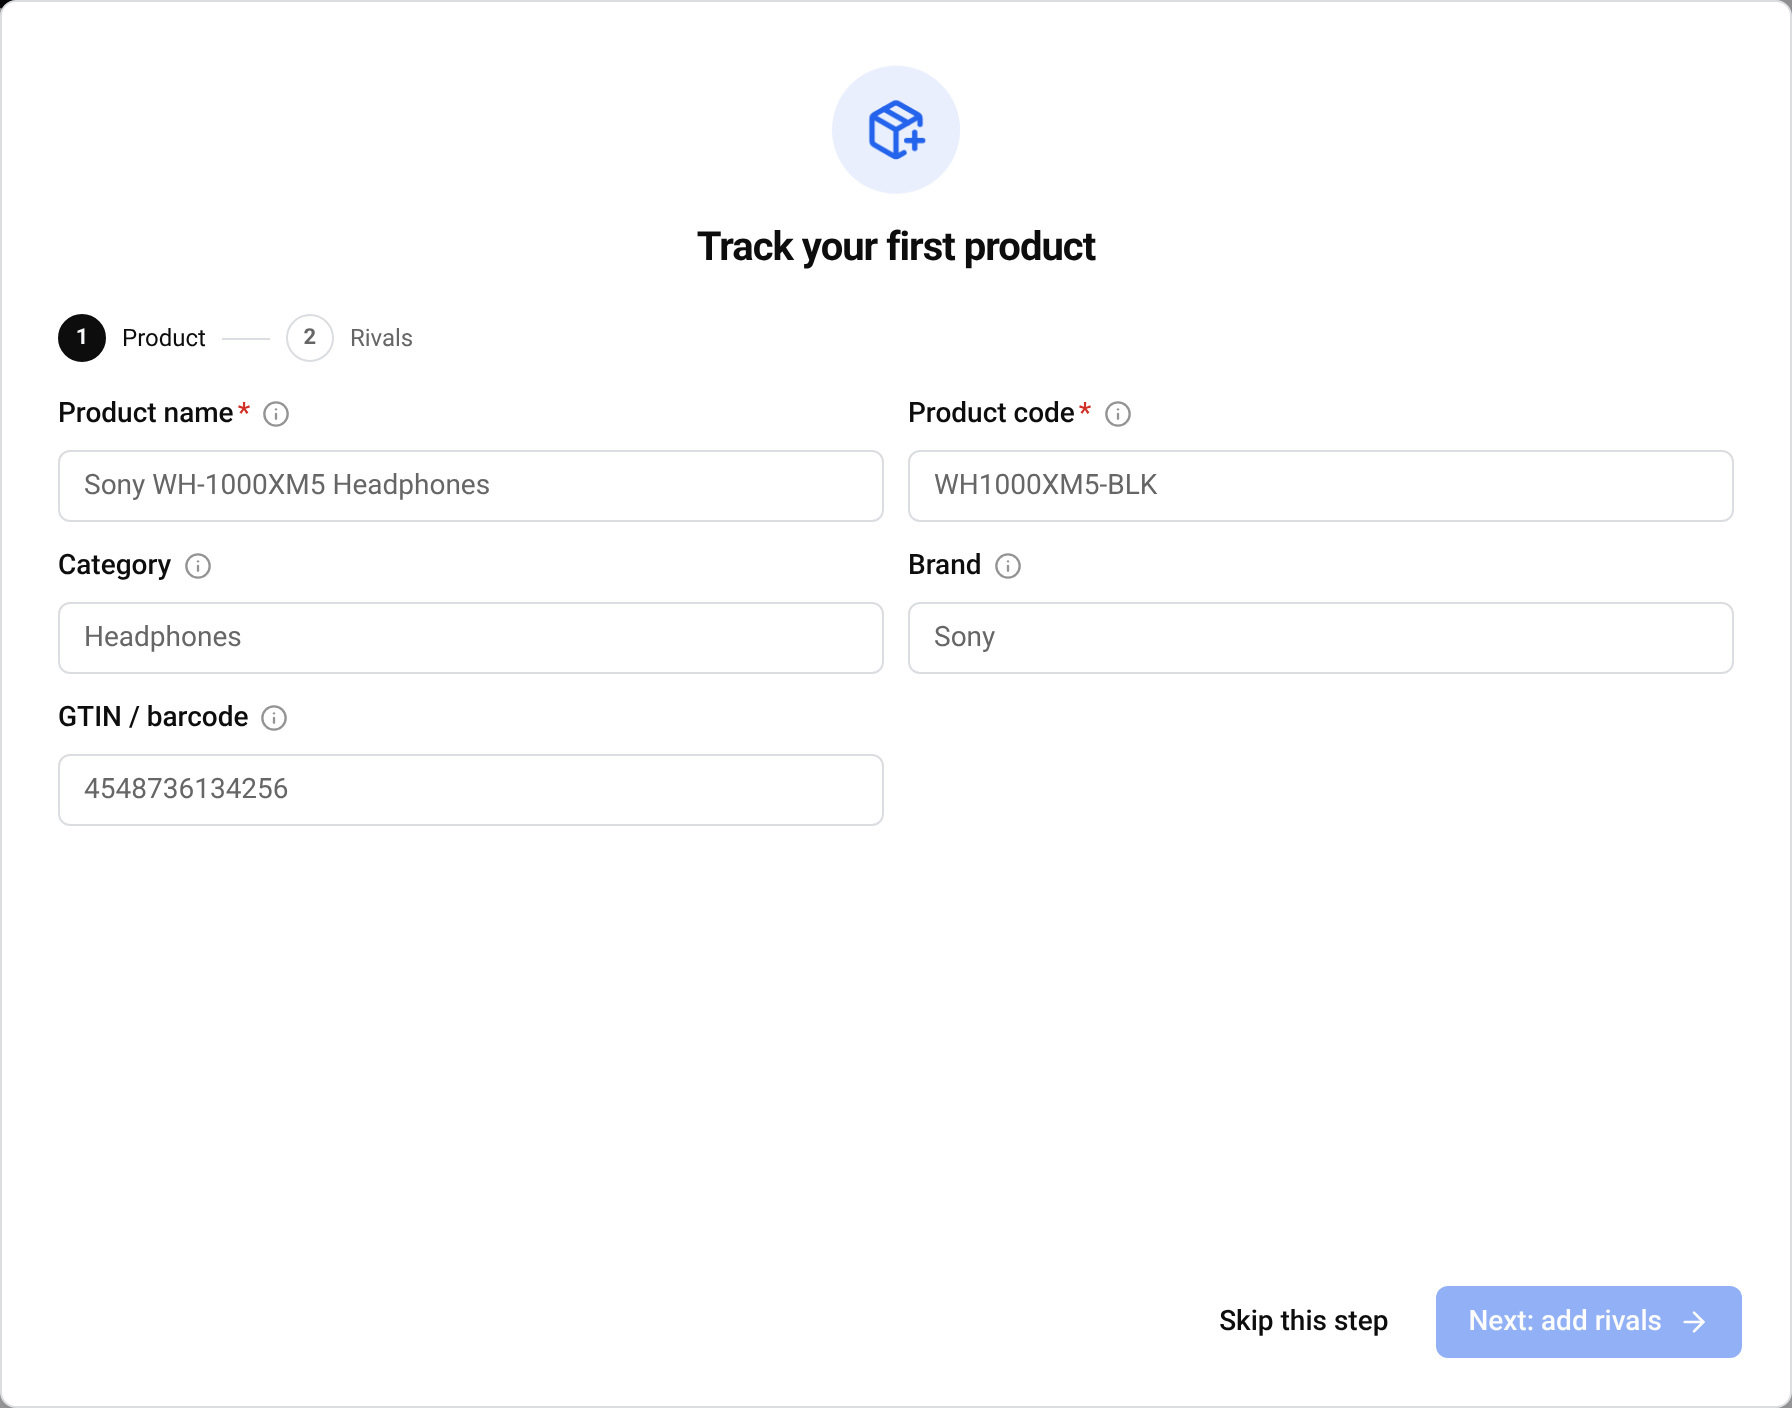
Continue to the links
Press Next: add rivals.
Add the product pages
Open the product on a competitor’s website, copy the address from your browser, and paste it here. Use the page of this exact product, the one that shows its price. Press Add link, then repeat for each store.
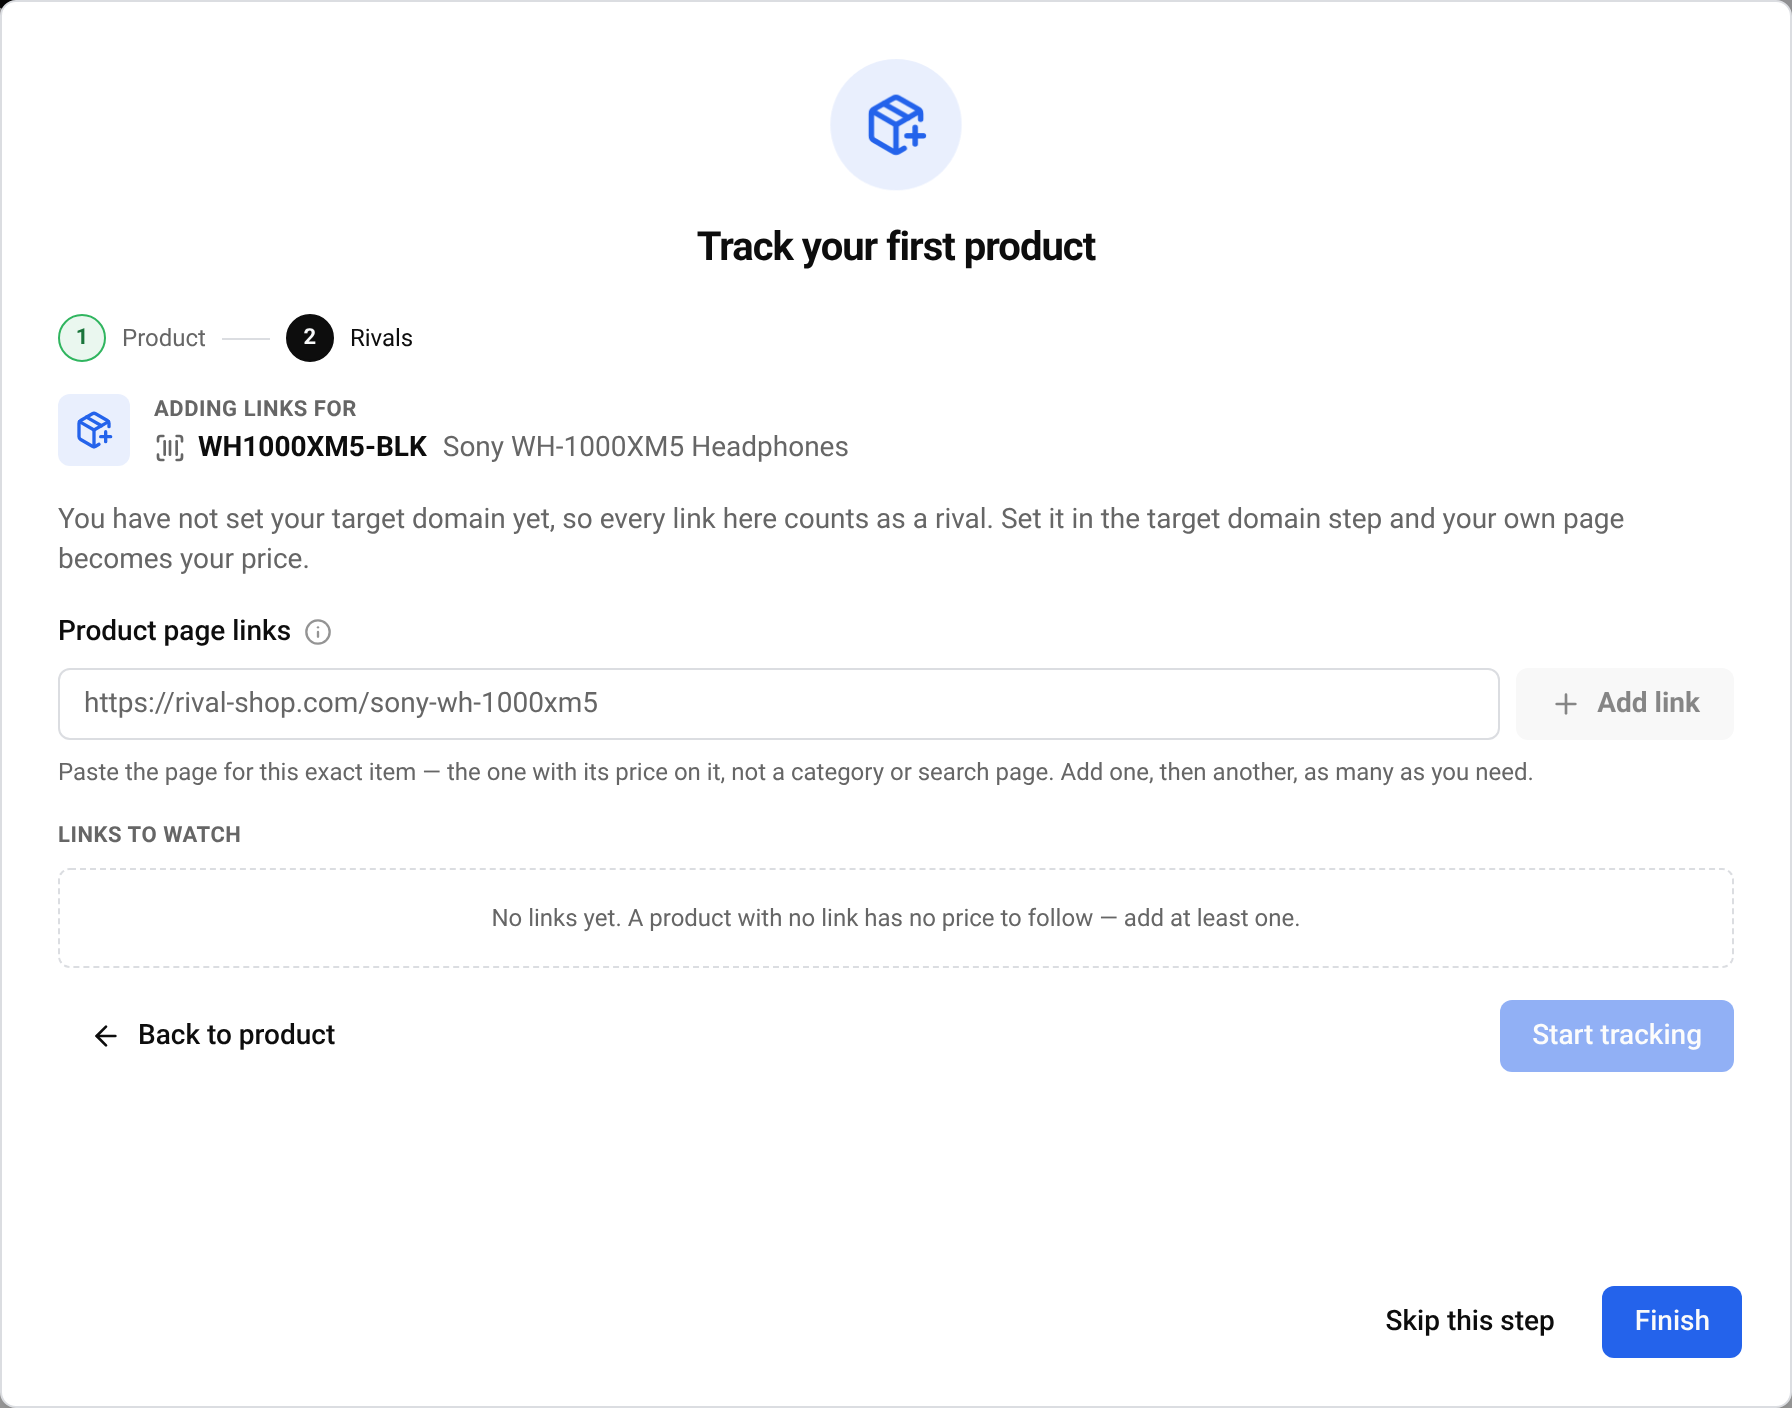
Start tracking
Press Start tracking. The first prices appear on the product within a short while. You do not need to wait on this screen.
Tip A link from your own store is marked yours, and every other link is marked rival. If you skipped Step 2, every link counts as a competitor until you add your store’s address.
What to do next
- Choose how you want to hear about price changes: Get price change notifications.
- Send price alerts to your team chat: Send price alerts to Telegram.
Questions
Do I have to finish every step at once?
No. Skip any step and come back to it later from the dashboard.
What is a product code?
A short name you choose to tell your products apart, such as the code you already use in your shop. It must be different for every product.
Why does a product need links?
A product on its own has no price. Each link is a store page that BlackAha checks, so prices appear once at least one link is added.
Can I add many products at once?
Yes. After this first product, open Products and use Import CSV to add many products from one file.
Related guides
Still stuck?
Open Support in the app and our team will reply there. You can also email our support team; the address is at the bottom of every page.
 English
 ไทย
 Tiếng Việt
 한국어
 日本語
 简体中文
 Français
 Deutsch
 Русский
 Italiano
 Polski
 Español